


this post isn't really about one specific tip, just an overall idea about improving an image.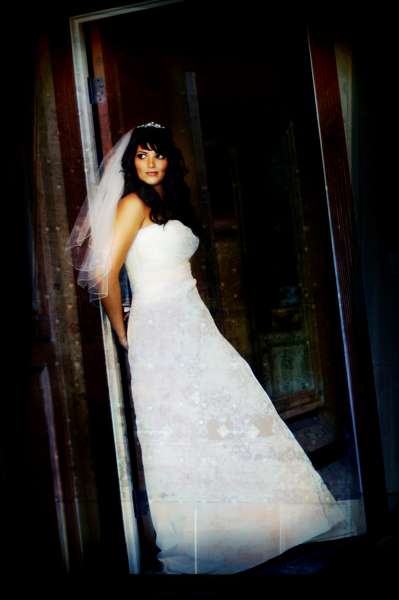
I took this shot about six weeks ago at the Turnip Rose in Costa Mesa. It was hard shooting in this room because it was 9:30 in the morning and the sun was blazing in the east facing window.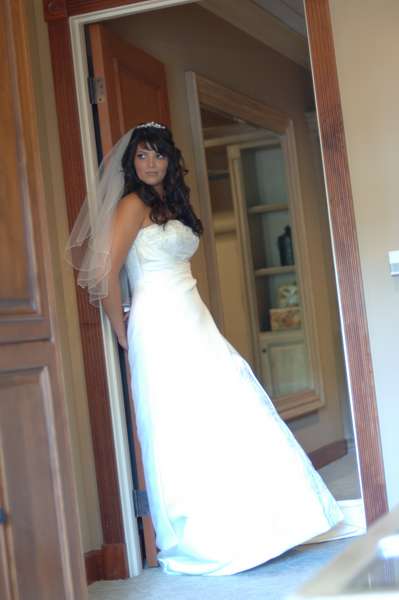 I liked the composition and the Bride's expression in the original shot but the color and exposure were terrible due to the fact that the sun was coming halfway up her dress and blowin it out while her face was underexposed.... What to do??
I started by using the sponge tool (grouped with the dodge and burn tools) to desaturate the blue on her dress. I then used a levels adjustment layer to darken the background (move the middle slider right to taste). I then used the mask to reveal the Bride. Her face was still underexposed so I used a curve layer mask to remedy that problem.
After the overall corrections, I used the burn tool to darken different parts of the background to fine-tune the look.
The last thing I did was use a texture layer (a photo of a huge metal door I took in Italy). I drug this over my image and changed the blending mode 'till I liked the effect. You can change the blending mode by selecting the layer in the layers pallet and changing the blending mode from normal to ??? I usually highlight it and scroll through them with the arrow keys. The other way to change it is to double click on the layer in the layers pallet and change the blending mode in the layer properties dialog box.
Burn, baby burn~
Monday, September 18, 2006
burn it
Subscribe to:
Post Comments (Atom)
1 comment:
That is super impressive! I love the end result!!
Post a Comment