

I just got this month's email newsletter from Amy at Amy's Guide.com. She is a coordinator on the east coast and has a very informative site/ newsletter.
The thing that struck me was her note about PaperBride.com- very cool stuff. And the companion site PaperMama.com.
Check it out and subscribe to her newsletter if you have a wedding coming up.
Thursday, June 29, 2006
Bride's Resource Site
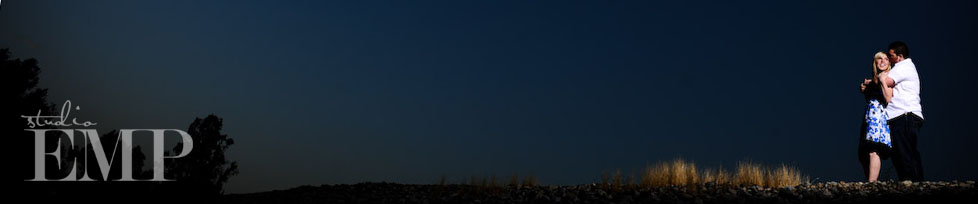
Multiple Curve Adjustment Layers
This trick comes in handy often when I have an evening shot and want cool twilight skies with a properly (or close to) exposed foreground. I like to shoot these a little under-exposed to not blow out the light part of the sky or the lights. If you adjust for the foreground the sky gets washed out and if the sky looks good, the foreground would be black...
Enter curve adjustment layers (at the bottom of the layers pallet click the half black half white circle then choose curves)... Do the first one to make the foreground look good, don't worry about the sky yet. When it looks good use the gradient tool (press 'g' to select it from the tools; be sure to use the simple black to white gradient from the picker on the top left of your workspace) on the mask to fade the effect (the mask should be active after creating the adjustment layer). If you don't like the first try with the gradient tool simply keep doing it over and over, the new just erases the old.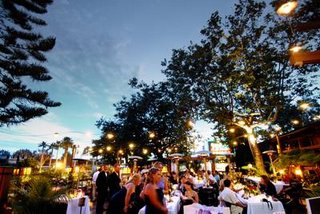
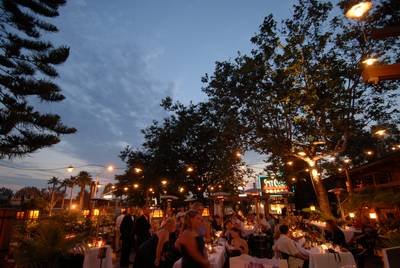
This is what you will have, a yucky grey/blue sky...
Now, make another curve adjustment layer and correct for the sky (this will usually be a steeper 's' curve). When done with the curve, you need to make the gradient mask for this layer. Here's the trick: make the first mask you made active by clicking on it in the layers pallet. Then hold down 'alt' while you drag this mask to the new mask. PS will ask you if you want to replace the current mask, click 'yes'. Now, with the new mask active hit 'ctlr i' to invert the mask and viola!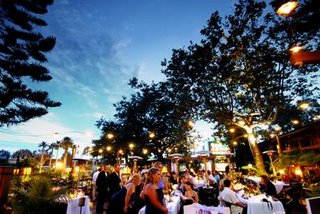
The finished product.
This shot was taken on Sunday at Salt Creek Grille in Dana Point. I was there for a wedding reception and got to taste their magnificent food. I had never been there and can't wait to go back. Sri, the Event Sales Coordinator and the staff were great and I loved the ambiance... I want the hanging lights for my backyard!!
Monday, June 26, 2006
My Kids!

So I was unloading a background and lightstands from the car today and thought how long it had been since I shot the kids with a backdrop....
I didn't clean them up or anything, just grabbed their sweaty little hands (very humid today) and had them sit for a moment.
 Caysen lasted about 7 minutes or so- enough for me to get off 91 frames. They will both be getting their hair cut soon so I thought I should record the shag.
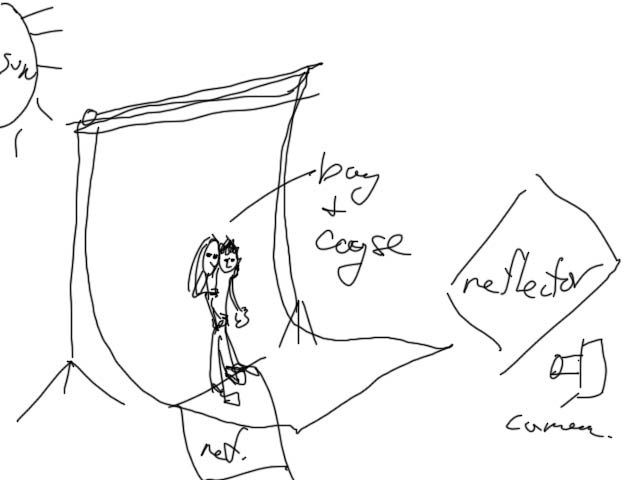 The sun was low, so I just had the backdrop facing away from the sun so it was backlit (check the pro diagram)- to try to hide any shades of grey. The backdrop should be a few stops hotter than your exposure to make it pure white. Paper is inexpensive, a neutral in tone, and is easy to set up. However, it isn't very durable- I usually let the kids color on it when the shoot is done.
I then used two reflectors to fill in their faces- very cool light. If the reflector is in full sun, I use white, if it is in the shade, I use silver or silver/gold.
I didn't give them much instruction, just to sit and where to look sometimes...
Bailey is growing up fast. She had this little model attitude (not bad, just.......just confident and a little sassy). She said she didn't want to be there, but she seemed to really like it...

Saturday, June 24, 2006
Commercial Shoot
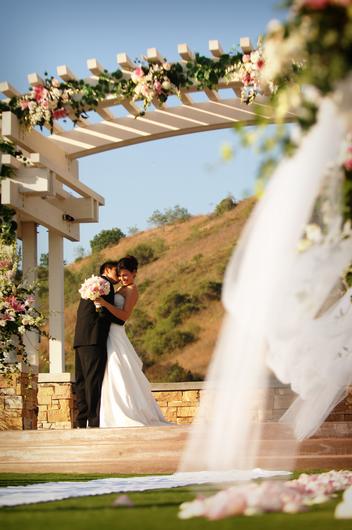

What a blast!! I never would have thought that a mock wedding could be so fun!! We did a shoot yesterday for Black Gold Gold Course in Yorba Linda to get some marketing images to promote their cool new ceremony facility right next to the green. The amazing flowers were done by The Flowers in Bloom from Yorba Linda and the professional (not really, but they seemed to be) were a couple of mine who got married in May in Fullerton (Nichole and Steve).
We timed it in order to take advantage of the low sun and everything worked out perfectly. I got a little carried away and kept shooting and shooting.... sorry Nichole and Steve!! They were great sports and let me do whatever I wanted.
Great time.
Wednesday, June 21, 2006
Yesterday's Engagement Shoot

We had a great shoot yesterday- just down the street from our house right here in Fullerton.
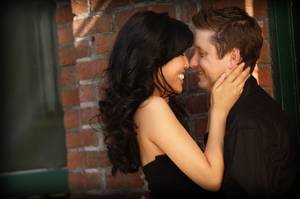
Michele and Jimmy were great to shoot and were up for any of my crazy ideas. I love how the semi-low (from about 5-7pm) sun plays off the buildings in the city.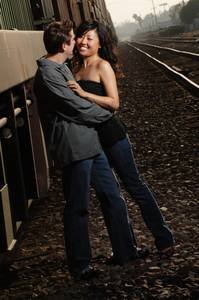 I played a little on the RR tracks with flash- which I don't use very often. I love the look I see in fashion mags were the flash is the main light and the sun is the fill. The look isn't anything you would see in reality so it is strikingly cool. The trick is to have the light to full power, off camera, and right up close to the subject (radio slave required) so you can get all the power possible- we've got to overpower the sun... I used a Q Flash.
Then, set the camera to the fastest sync speed and find the aperture for the correct exposure. Then play...
The shots downtown were cool too.

All in all we got some great stuff- Hope so, we shot over 300 images.
Photoshop: frame/ border action
Now for the start of the Photoshop tips:
My brother has become a photographer in his own right and asked me about printing some of his work to sell to other bike enthusiasts. I made a quick action to turn a photo into a printable, poster style image with a title and a border: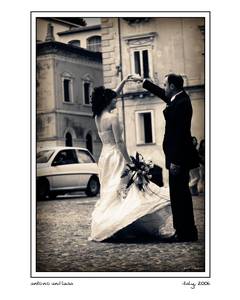
The action resizes the image, adds both the stokes, makes the white background, and adds text. Just double click the text layer to edit.
It is very easy to make your own action, but if you would like I can send you this one- shoot me an email.
Tuesday, June 20, 2006
Italy!!!
Wow! Italy was a great place to make photos, that's for sure. I shot a few thousand images in the two weeks I was there. Stories abound about the people, the sites and the culture.
Of course the main purpose of the trip was to cover a wedding so I will begin with photos from that.
They have many different wedding customs than we do but there are also many that were similar to ours.
After the Groom gets ready and honks his horn as he passes the Brides house (you can actually hear a horn anywhere in the town from anywhere else in the town) on his way to the church to give the 'all clear' for the Bride to walk through the town with her entire family on their way to the church. Neighbors all come out and chuck rice and candy almonds at them as they pass...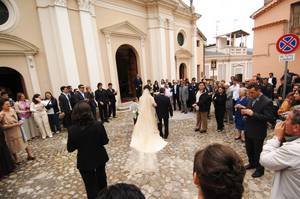
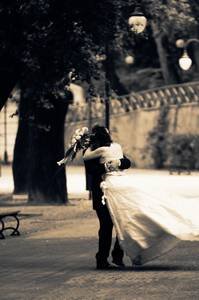
This photo was after the ceremony. The church is in a little square and they had to walk up the street to get to the car... The only BMW 3 series in the town (borrowed).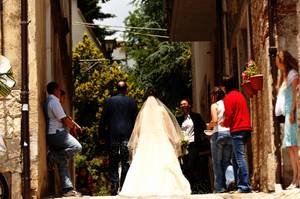
I was hoping to get more images of the Bride and Groom in the streets or at a castle but I didn't want to be pushy- they wanted to shoot at a park filled with trees... Just like the park behind my house!!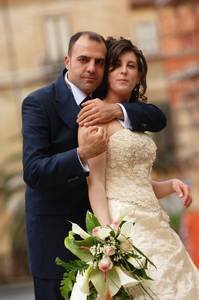

I did manage to get a handful of shots with buildings in the background.
The custom of writing on the get-away car is alive and well there. The Groom's buddies did a bang up job-- with toothpaste!! There were even representations of genitalia and toothpaste under the door knob to make a mess of the couple's hands as they opened the doors....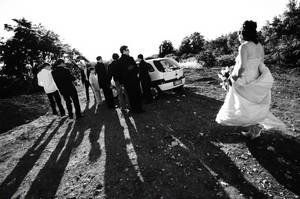
All in all the couple was great to shoot- both pretty goofy and fun- and the friends and family were amazingly hospitable. I felt like a mime at the reception because I couldn't communicate verbally- I was even more of a dork than normal to get people to laugh and have fun. They all nicknamed me 'Photo Clown'...
Subscribe to:
Posts (Atom)